Being familiar with the Slow Stick Jenny instructions will be helpful for the overall build of the Slow Stick Cub even though it’s a simpler model on some levels, it has it’s own unique style and format that is different from the Slow Stick Cub which are pretty obvious from the get go mainly because it is designed for ailerons, cut into the wing. Refer to the main page for the Slow Stick Cub for the parts spread and layout prior to assembling and also read through this guide and the rest before gluing the parts in place. It is assumed the builder has some basic building experience, if not, it’s highly recommended to start out with the Sparrow, then the Comet Sparrow to get the basics in balsa building understood.
There is also an alternative build format that is helpful for general building as well at along the wing. A great big thank you to Paul Bradley’s contributions upon. happyrcflyer.com/Slow-Stick-Cub-Instructions.pdf
He also has some amazing work shown at parmodels.com
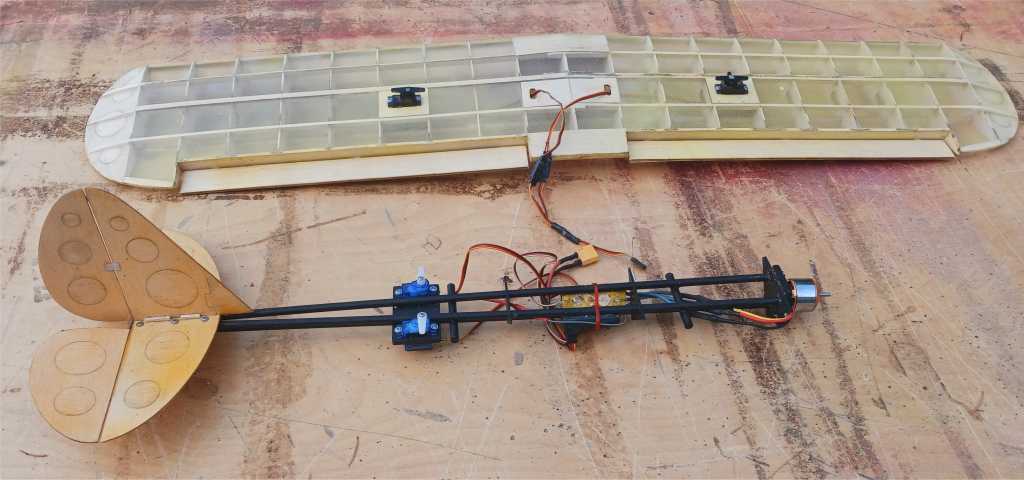
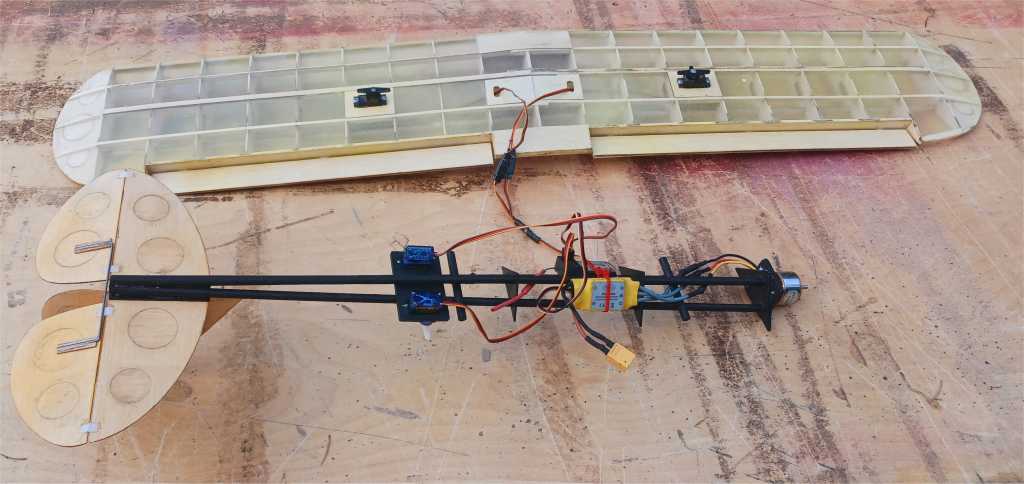
The fuselage is the exact same system and format as the Slow Stick Jenny with two revisions upon being the tail feather servo placement which is lower on the fuselage and the tail mounting plate which has been pre-cut with holes in it along with the stabilizer to be optionally screwed into place. This allows for it to be used for the Slow Stick Cub and Slow Stick Jenny wing and tail assembly along with future designs and patterns that are based upon this platform.
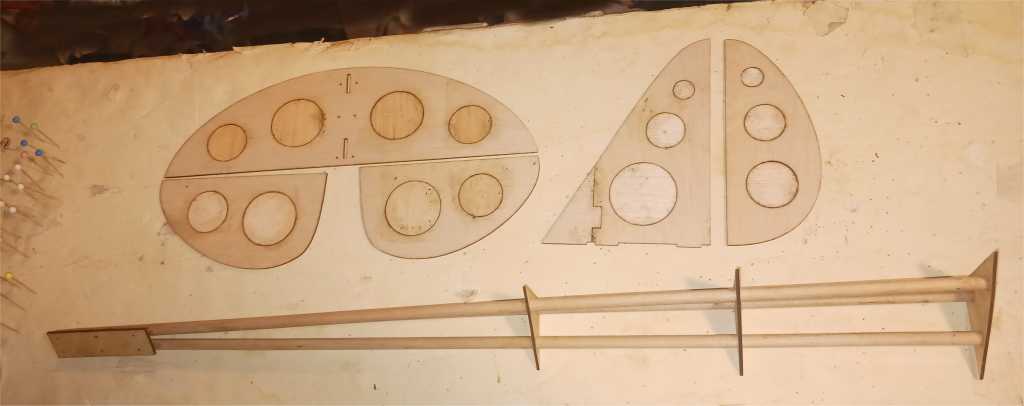
Take note along the strengthening holes to glue them in place cross-grained. Test fit spacers prior to mounting, gently sand if necessary to ease the fit. It’s advisable to use PVA or 30 minute epoxy to mount spacers, gluing tail section where the dowels join while the spacers are dry fitted in place after the wing has been test fitted. Tape in place on the tail section prior, or if you must, put a light small dab of CA to just keep them tacked together, since you may need to refit and adjust afterwards once the wing is set in place. Complicated, I know sounding, but it makes sense during construction.
Second spacer is 4 ½” from tip of front spacer/motor mount.
Third spacer is 8 ½” from tip of front spacer/motor mount.
Trim right, down thrust on leading edge dowels as desired before mounting front spacer.
Notch second spacer based upon the angle of dihedral set from building the wing.
Cut two lengths of ¼” dowel stock at 2 ½” for rubber band mounts.
Notch area on the fuselage/dowel stock before gluing in place, forward and aft of wing placement after the wing is built
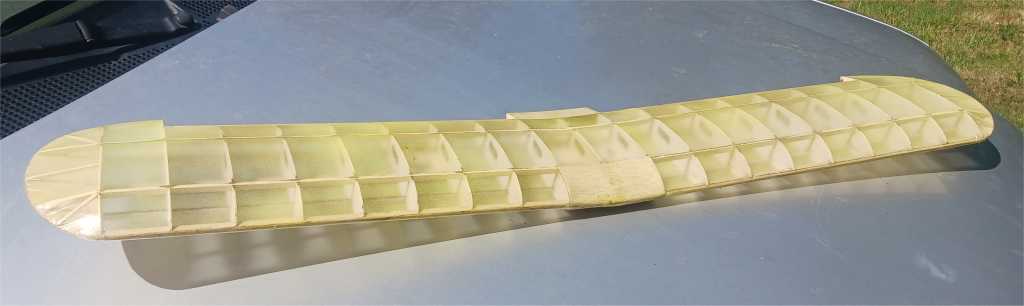
The wing assembly.
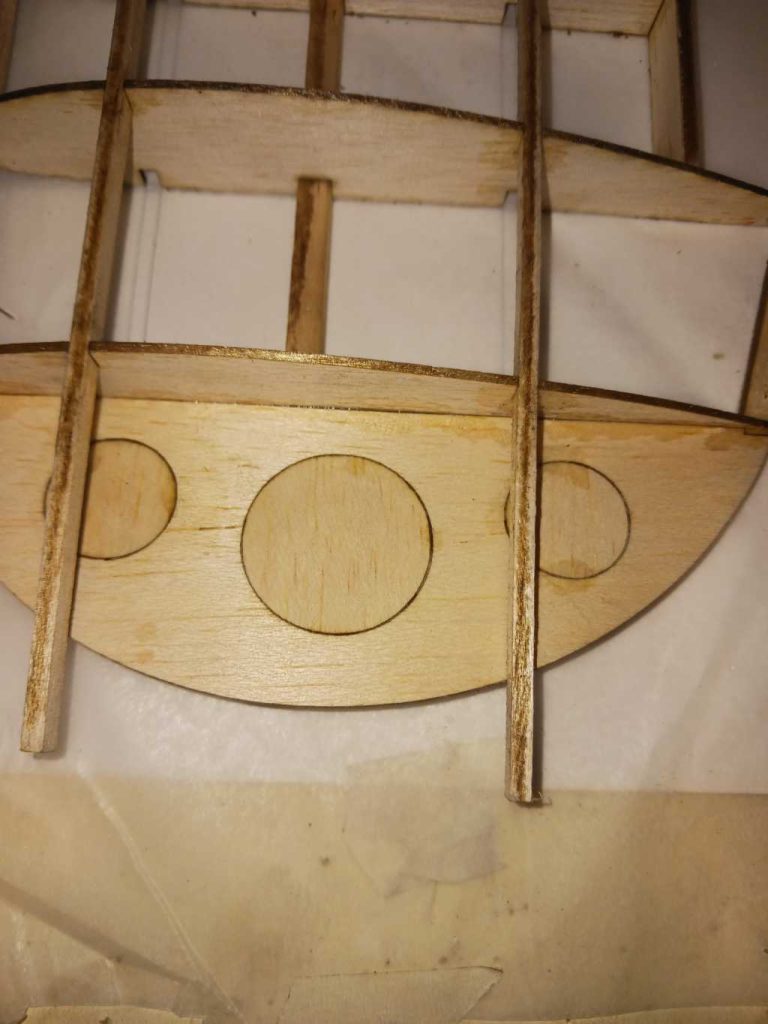
Showing the right side of the wing, take note the root or center rib is not glued in place, line up the ribs on the plan and glue in place the top two spars, not the bottom or leading edge. The top spars will be longer then the length of the inner wing so they can tie in together. The wing tip can be angled upwards to form a winglet.
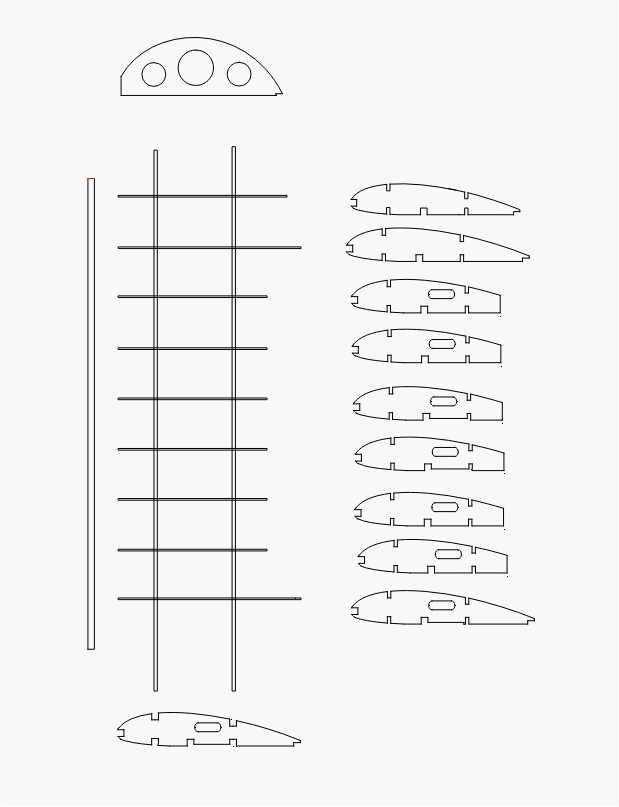
An easy method for the base assembly is to rest the main lower spar into place not glued in as of yet just for alignment, with the center rib and cap strip where the aileron is going to mount to, to tie it together along with the joining strips.
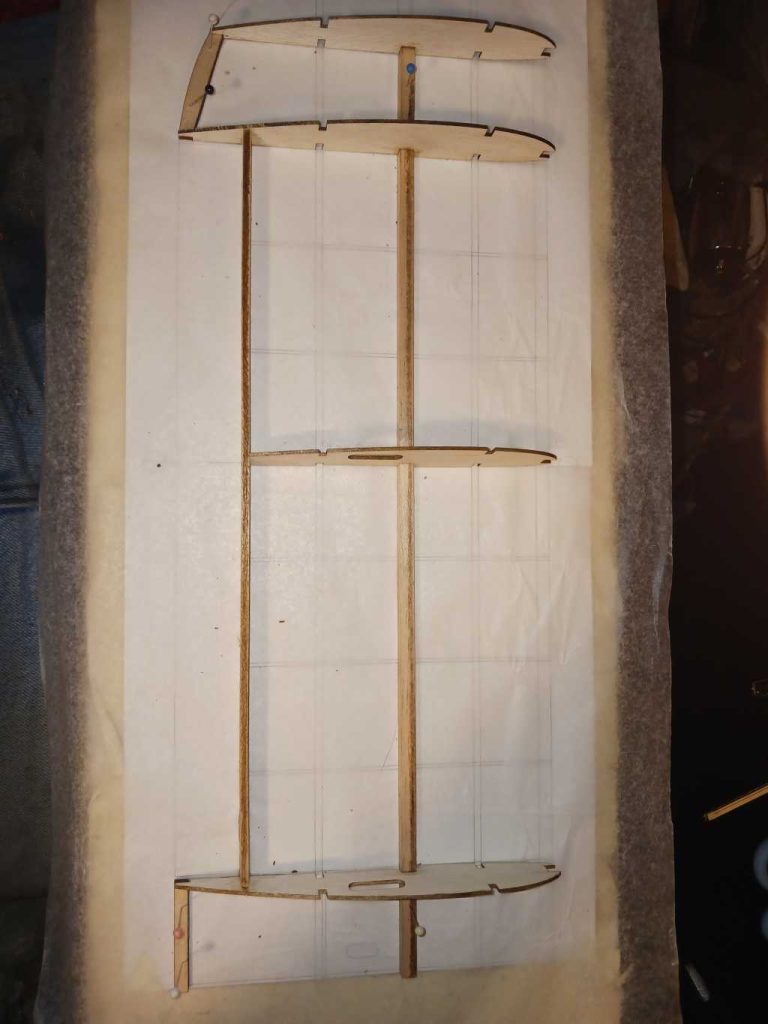
Take note when you get to the leading edge, how it’s angled one direction on the tip which is the dihedral angle. This is the same angle as the original Slow Stick Jenny, it can be increased with some sanding for greater stability but not too much since it will interfere with the aileron controls. This can be added after the two wing halves are joined together with the top spars only.
Setting the wingtip, angle for winglet style setting against the upper spars and also set the wash upon as desired.
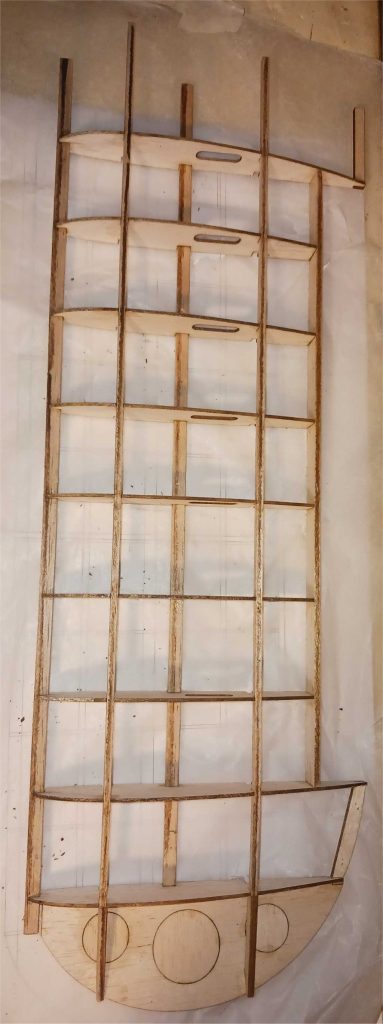
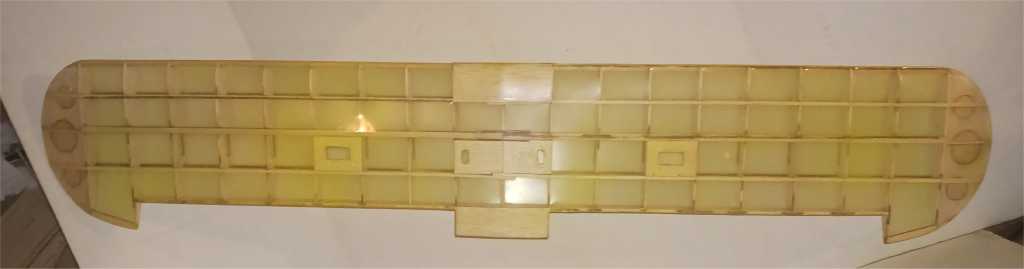
Showing the wing panel ready to join it’s second half, take note the top spar’s on the tips are cut sections and shaved in place flush based upon the angle of the wing tips. Even though my front and lower spar is glued into place, for new builders it’s best to leave them unglued for now while you join the halves. The center rib will be float in the middle as you join the halves, squared up and glued into place. Add the leading edge and main lower spar afterwards.
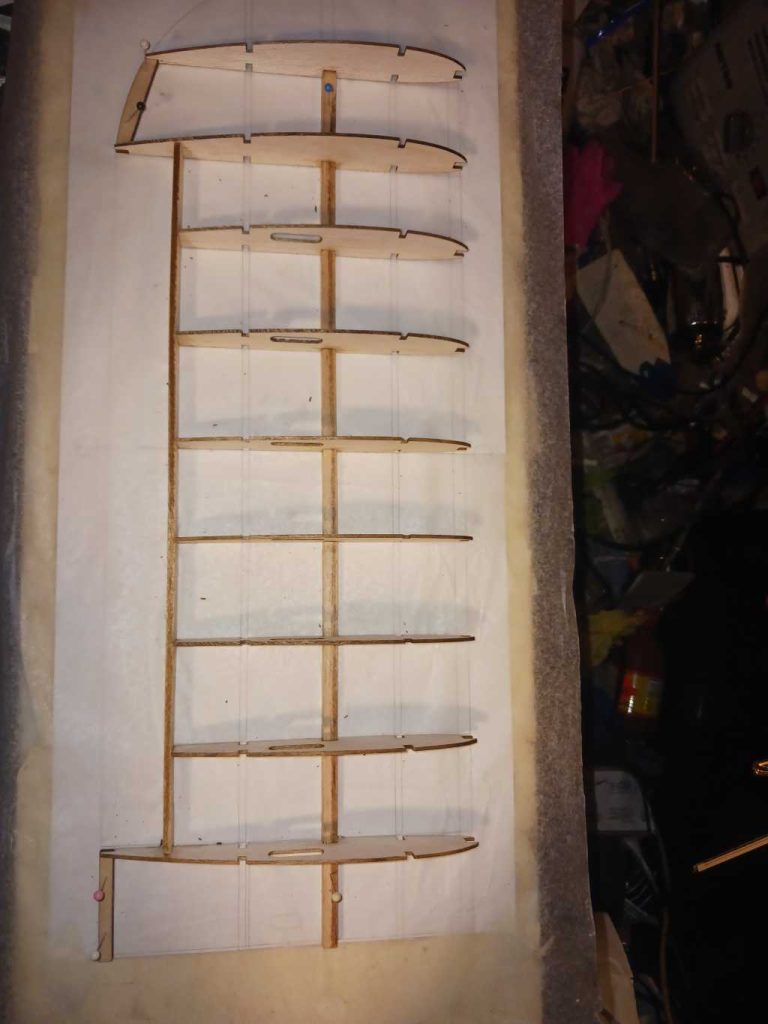
There are some thin ply joining stock which needs to be added tactfully, in order on the leading edge and main lower spar. It’s also shaped at the standard/stock dihedral angle in addition. Join and glue in the top spars, trim off their excess, along with the center rib to complete the basic structure of the wings. Then add the lower spars, fill in stock area on the trailing edge and the rest as needed.
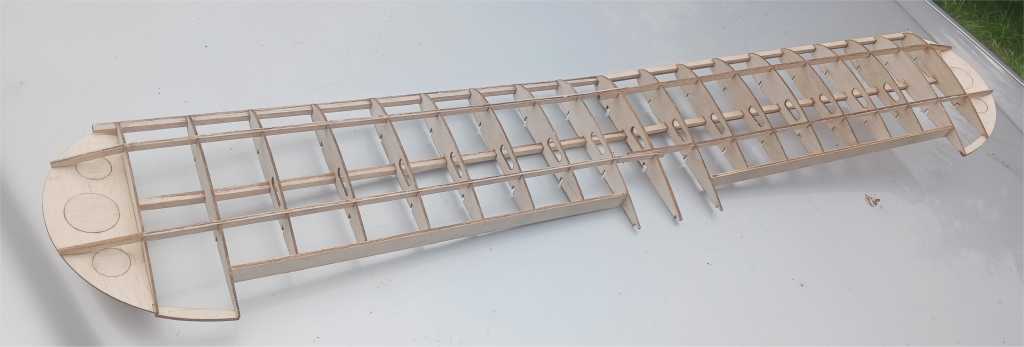
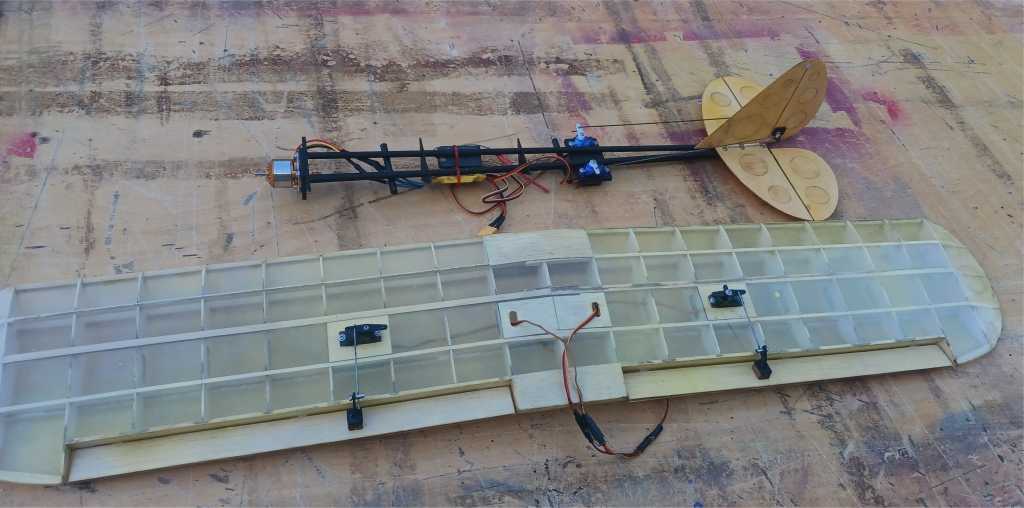
Add the center trailing edge stock, sheeting, aileron plates and servo lead plates. It may help to review the original parts layout, it’s assumed the builder knows how to soak and bend 1/32″ sheeting on this build. The cut away sections on the ribs for where the plates mount can be revised as needed to change where they are positioned as desired and/or adding flaps.

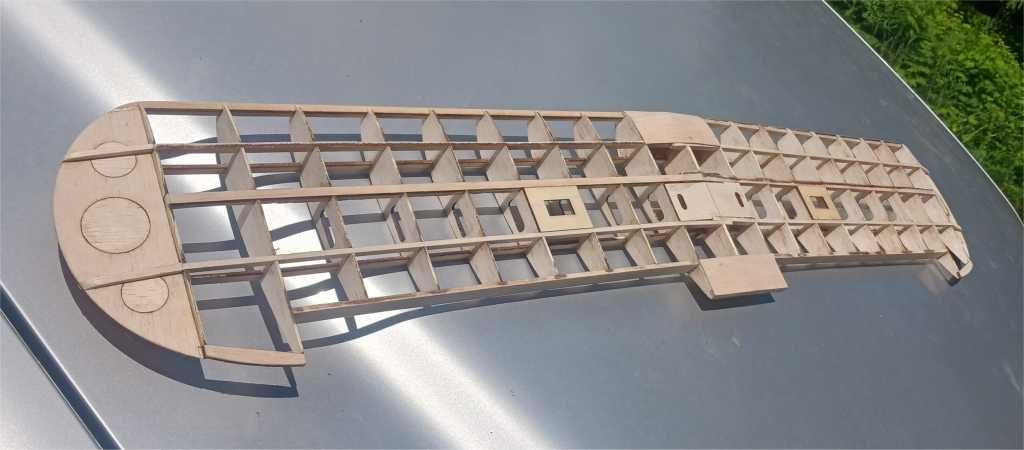
From here, fill in the stock necessary on the wing ends and cover. Adding some additional diagonal stringers along with prior if desired.
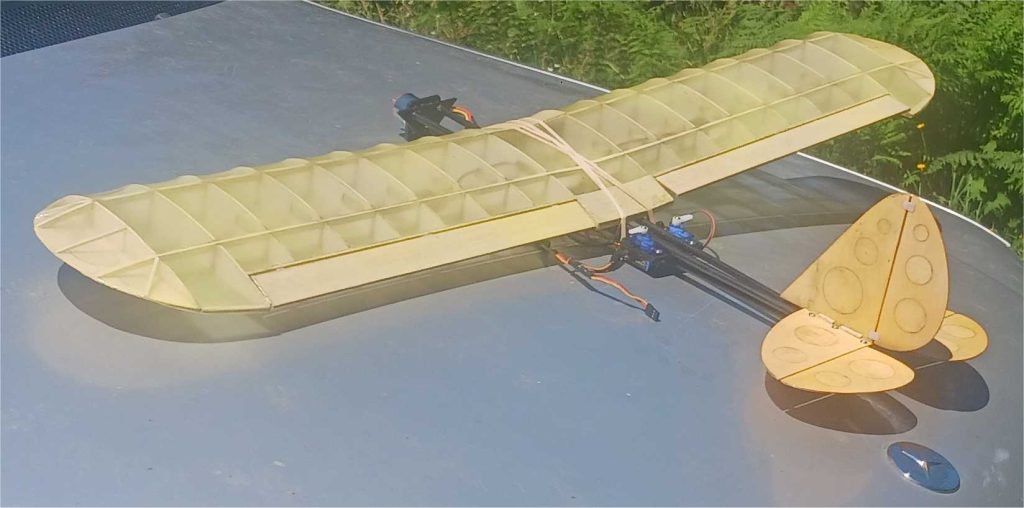
The ailerons are simple flat stock, shim up the control horns for a flatter format or just adjust the positions of the push wire along with them. These can also be built up for a finer approach, this would also make that aspect a project that the typical builder can choose to move forward upon, not necessarily required for this build.
You should by now be able to temporally tack and tape together the plane parts along with testing out the bands to hold onto the wings. It’s a great stage in the build to add the wing mount bands to hold it into place with the dowel stock to secure to for proper placement to notch and glue into place. This is not a first time beginners build so I will not bore you upon the tail feathers placement.
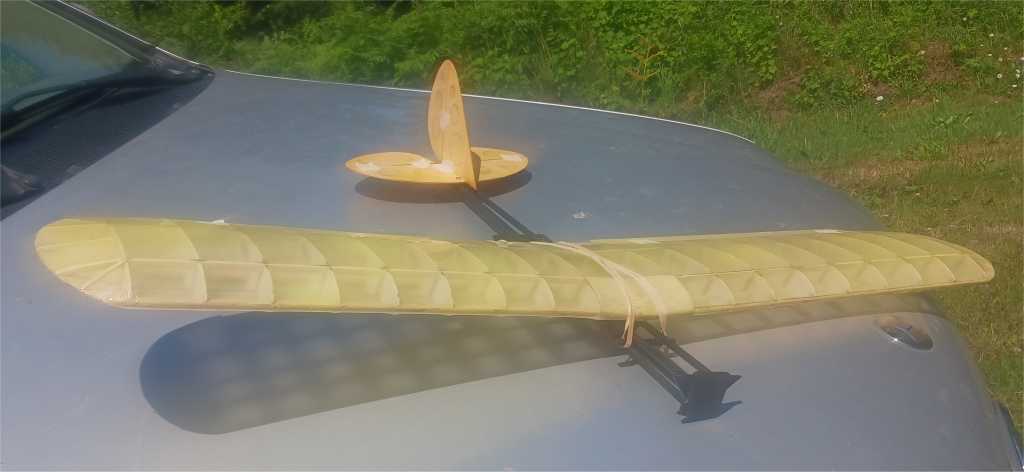
From here, just add the gear, push rods and the rest. Further updates will be shown with them hooked up, for now this should do, for that first person and only person that purchased this kit and they, or the person they bought for will have some helpful guidance upon. I will expand upon this here, I do always with phone, text, email, social media, PM and the rest if needed, this is it, this is enough for the current upon until it’s next chapter for final build and flight. This is an absolute, optimum in design that personifies the Slow Stick style plane that can be toned down to a simple tail feather control, more acrobatics and in general regardless, something you will be both proud to have in your hanger and in addition, being a traditional build will be something you can hand down to younger generations.
Check back for future updates on this amazing plane! Build guide additions, video and more! Again, review the Slow Stick Jenny instructions for more details that relate to this plane if you are brand new to building.